Thursday, February 17, 2011

More fabric cards

Last  week was my birthday, so as part of the BQL postcard swap I received 13 cards. You could easily get used to so much attention.
By Jacquie, the white fabric is folded.

By Avril, you can use the felted flower as a brooch, it has a pin at the back. So clever.

By Carole

By Barbara G, I love the birthday ribbon.

By Janet B

By Rosemary

By Lois, I am so sorry this one got damaged in the post.

By Irene, I love the edging.

By Jan S, hand embroidery.

By Lesley, another one damaged by the post.

By Sandra, each stamp is on a separate piece of fabric, and appliqued.

By Sue W, I don't know how she managed to sew all these shapes together.

By Plum, I wish it had not been damaged.
The theme I had chosen for my cards was red and white as you must have guessed. There is a lot of inspiration in all of these. So I am saying a big THANK YOU.

As there was also Valentine's Day this week I made a card for my DH, well 2 in fact.
There are some beads around the heart on the right.
That's a lot of cards.

Sunday, February 13, 2011

Crochet holder

 For some time I have followed the blog of Cecile Franconie, she is french and writes in french but don't let that stop you from visiting and having a look. She uses embroidery to the maximum, adding ribbons and beads. Her choice of fabrics is different and opens new doors.
Her blog is "Facile Cecile", and she also has some projects published in magazines, like Magic Patch, which is translated in English, and books like this one "rangements a coudre". Her next one is coming in March.

Let's come back to my crochet holder. I've used some liberty fabric inside, a piece of ribbon to close it, and some crochet along the top edge. This makes all the difference from other crochet holders, and is in the style of Cecile. Why make simple things when you can make beautiful things.


She admits to spending a lot of time sewing, crocheting or knitting, as well as having a big family.


  So I hope to have inspired you to discover somebody new, or maybe you already knew about her work.

 Have a good Sunday.

Tuesday, February 01, 2011

How to make a Kindle sleeve

My husband received a Kindle for Christmas, and is using it quite a lot. Naturally he would like to protect it with a sleeve, and asked me to make him one, with my fabric figuring some writing.
The explanation does not include size so that you can adapt this idea to any device you want to cover.

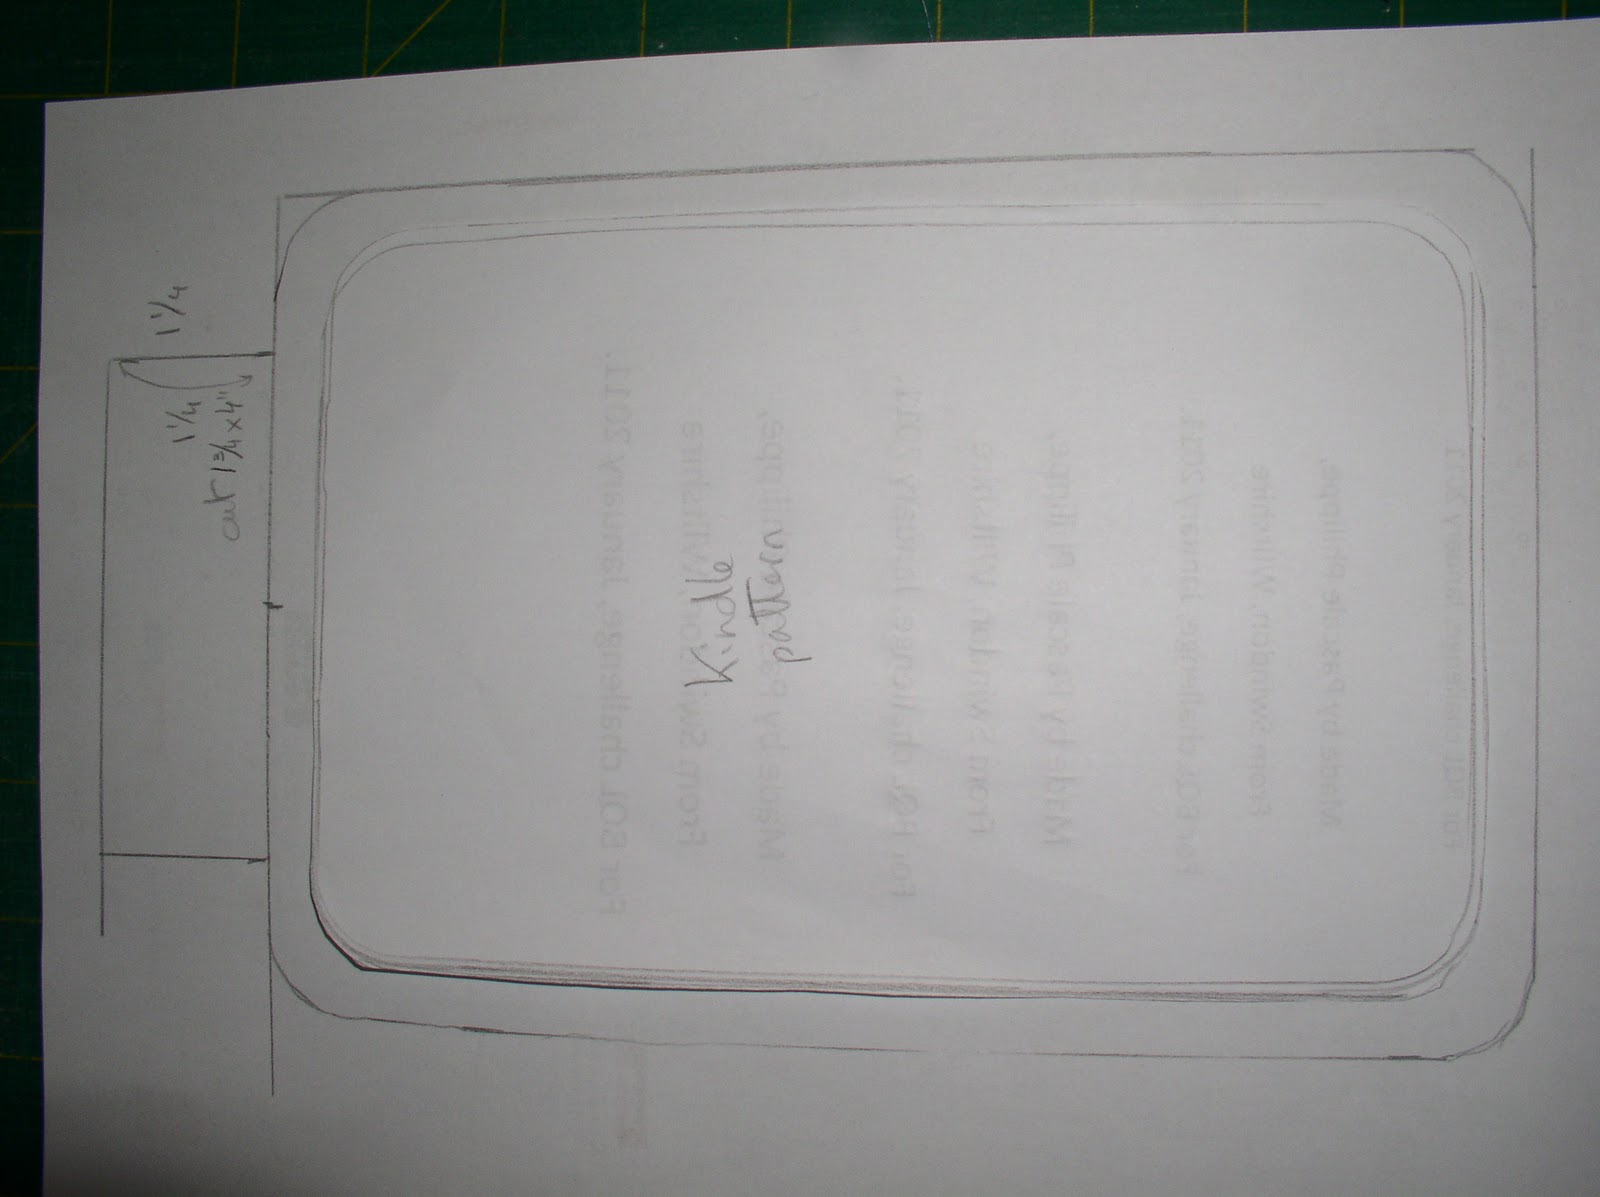
First I went around the Kindle with a pencil held straight vertically, to have a pattern . Then I added 3/4" in width and length, to allow for the seam allowance and the  volume of the fabric and wadding all around. I can tell you that it fitted snugly.


Here you can see my 2 paper patterns. I added a little flap at the top, to attach the Velcro for the closure.

 Now we are cutting the fabric. Using the biggest paper pattern, you need 2 fabric pieces for the front and back, same with the lining. You also need to cut a rectangle for the flap, and a piece of Velcro. Fold the rectangle of fabric in 2 to find the middle, and stitch down one part of the Velcro.

 You also need to cut the wadding, and I used the smaller paper pattern, to limit the volume in the seams. Quilt it down on the front and back. If you have some stiff wadding, you can use that, especially to protect the screen.

 Here you can see the reverse of the Velcro flap, I have sewn the sides and cut the corners near the centre fold. You just need to turn it out.

 I have attached the outside and the lining together, trying to follow the round shape around the corners. On the piece that is to become the back, I have inserted the Velcro flap.


 The last stage is to attach the 2 final parts together, and I haven't got the photos. I suppose I must have forgotten.
You will put the outside parts right sides together, pin them, and do the same with the lining parts, leaving a gap on the side or the bottom to turn everything out. Follow the curves with your sewing machine.
The tricky bit is the middle. You might need to finish that by hand to have a very neat result, or try it by machine.
When you have finished sewing, turn everything right side out, and slip stitch the opening closed.


 I chose to have a bigger opening at the top, so that you can pull the Kindle out.

 Nice finish !
So here we are.

I am happy that I don't need to buy the sleeves offered in shops. They are all the same, overpriced and not original for a penny.
And I am proud that my work is deemed worth it by my family. Love it.
Now it's your turn.

Thursday, January 27, 2011

Birthday cards

 In the BQL birthday card swap, I had to make a card this week. I went crazy.
It 's a technique that I find is not as easy as it seems, so it gave me some practice, and I think the results are quite nice.
I chose bright fabrics to make a cheerful card, and I kept the second one as an example of my work. I hope that Lesley who will receive it will like it.

Wednesday, January 19, 2011

Skinny quilt

This year I am also taking part in a challenge on BQL to make skinny quilts. It just means that we don't have to spend too much time on them, because they have a smaller size. The first challenge is to make a 12" by 18" quilt before the end of February.
This is my contribution :
 There are 24 log cabin squares with a blue centre, and light surround. Because of the binding, the size is a bit bigger than the one required, but that shouldn't be a problem.
I finished yesterday to put the binding, after embroidering a label at the back, and putting a sleeve for hanging.

To make it more interesting, hopefully, I inserted little triangles of fabric between the rows.

Now the next stage for me will be at the end of February, when we have to choose our 5 favourites little quilts, and then Kandy will swap them between us, with a priority in choice to the first people to have finished their pieces. She has found a way to make us work faster, and not wait for the last day at midnight.

On Monday I have also spent most of the day tidying up my sewing area and my stock of fabric. I am happy to have finished, although I have more boxes of fabric in our bedroom, there is less visible in the lounge where my sewing machine is.
It was nice to sometimes rediscover the fabric I bought. There were even 4 fat quarters bought twice! I have sorted some of the pieces by colour and have boxes for : white, dark, blue, green and red. The rest fills 3 drawers. Maybe I could do some projects using only some colours.
I also need to finish some of my projects, including 3 quilts which are more or less finished tops. One is for DD2 and she reminds me sometimes that she is waiting for it.
I would like this to happen this year.

Friday, January 14, 2011

More postcards

This year I have put my name down for a Birthday Swap with BQL postcard group. There are about 15 or 16 of us, and we have to send a postcard to each person for their birthday.
The first one in January was Lois, and she liked cats and flowers; I made her a cat card, first time for me. I appliqued some pink felt on a background made with 3 green fabrics, and added a ribbon on the neck of the green eyed cat.

There are 2 more birthdays in January, and I prepared one card already, but I find it very difficult to photograph.


The colours are not true. The pink is more intense, and the dark blue is not black.

I find that this swap gives me the opportunity to try new techniques, like free machine embroidery on this one. I first tried with a white thread, but it didn't come out much. I then added a dark thread and it has much more impact. Lesson learnt. I then cut the fabric around the flower designs.
You can now expect a few more cards along this year.

Tuesday, January 11, 2011

Presents from Secret Santa

As for last year, I took part in a Secret Santa exchange of quilt related presents on BQL. I received this very nice and clever square, with the hanger. It is quilted and the elephant is a little button. The black tree was appliqued. I should cherish this for a long time.

I myself made a present for a lady called Sue S who lives in France. Kandy who runs the group, told me the choice was made quite by accident as she uses the computer to determine who should send to who.
 She chose jewel colours as her preference, so that's what I used. I made a jewellery roll and 6 coasters.

The coasters and the back of one.


There is space for rings.

When open you can see the red fabric flap which I designed to pin earings, or brooches.


I believe she liked her present, and I hope she will use it for a long time.
This Secret Santa exchange is really a great idea.

Friday, January 07, 2011

Bag kits

For Christmas again, we prepared some sewing kits to make a bag. We made 2 and it took me some time to get all the parts together and to cut some of the fabric to the right size.
We, that is DD3 and myself, chose a bag project, so that it wouldn't be too complicated for beginners. At least I hope it won't be.
The 2 nieces are nearly 10 and 8, have never made something like this, and hopefully won't be put off sewing for life by this project.
I thought about it when I saw similar kits sold for £10 in shops, with some very basic supplies. I knew I could do better, but it does take time to get everything together.
I took some photos of the bags, which don't show much.


Everything was included, even the wadding.

The project was from a Tilda book which I happen to have in French. I copied the pages and put them inside, with some of my instructions as well. Book "La maison de Tilda" or "Sew Pretty Homestyle". The book also includes the needle holder shown in the previous post.

Now I just have to wait for the emails from the mums to ask for help.. or maybe not.