Sunday, July 26, 2009

Potatoe bag


No I am not doing another bag, again, although there will be some. This one is very utilitarian, it's to keep my potatoes dry (no plastic bag), and slow the greening process, as well as make them more interesting.

I used some cheap and strong fabric, sewed along the sides a french seam (in France we call it "une couture a l'anglaise", an english seam), leaving 2" at the top. You sew once at 1/4" of the edge, turn the bag inside out and sew again at 1/4". This way the raw edges are enclosed in the seam.

Then you fold twice the
fabric at the top to create a channel used to pull the string and close the bag. Sew along the fold on both sides of the bag.

The next step is to decorate, either yourself or with the help of some children on holidays at the moment !

I had fun with my youngest daughter while waiting at the swimming pool.
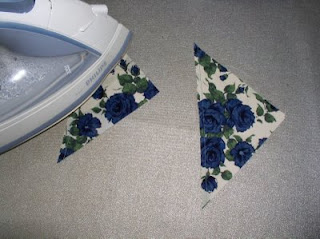
I used some "Fabricfun, pastel dye sticks" that you just iron when you have finished.

The plan was to make a few of these for the potatoes, onions, etc...but I am quite busy it seems and just managed to do one. They are easy and fun to make so I will come back to this.

We did put more colour on this side after I had taken the photograph.

I hope this might give you some ideas.

Sunday, July 19, 2009

July block for the calendar challenge


And this is my piece for July in my challenge organised by BQL.

The technique we were using is Bargello, which I have done before with pleasure. Kandy Newton prepares the instructions for us every month, and finds something new every time. I am looking forward to next month's challenge.

I changed 2 things :

- first I sewed all my strips together to the point that they were making a tube. You then cut the tube in the other direction to get rings of rectangles of fabrics of different width. You use the seam ripper at different intervals so that your top fabric changes following a pattern that creates waves of colors. I don't know if this is clear enough if you have not done Bargello before.
You then sew each column to the next to create the pattern.

-the other thing I changed was that I quilted the top and the wadding together, and then used the pillowcase method to finish my block. I sewed the backing right sides together with the front of the block, leaving an opening to turn it right side out. There is no binding.

I like the final effect, although it doesn't look like a traditional Bargello; the effect of the waves is a bit lost, it looks more like modern art !


Sewing through a pin


Yesterday while quilting on my sewing machine, I felt that it was struggling. I checked, everything seemed right and continued and things came back to normal.

When I had finished my piece (which you will see in my next post) I looked at the back and found out that a pin had been dragged in the wadding from somewhere near the machine bed, and I sewed through it. But not only over the metallic part, I sewed through the plastic bit at the end. That's a first for me.
I took 2 pictures.

And by the way the machine is fine, the needle is not even broken, but I don't want to do it again, just in case.

Thursday, July 09, 2009

My big big bag


This year our patchwork group, the Golden Lion Quilters from Swindon, had a challenge. We alternate every year between a challenge and some work for a charity.

We were given 2 fabrics at Christmas, to be used in the project we wanted, to be finished and
presented for the end of year. And so yesterday I was able to show my bag.


I chose to use fabrics from my remnant basket,
hoping to make a difference in its volume...and forgot about the fabrics given. I only remembered on Monday as I needed to make the handles, so used one fabric there, and the other was added on the inside pocket.


The idea of the big big bag came from needing one, either to carry a quilt or other voluminous objects. This one will be used at home.


When I thought about my bag being judged anonymously by other quilters, I realised I wouldn't win anything, and then reflected on my use of my fabrics.
I buy pieces of fabric I really like, and then avoid using them, because they are too nice ! I know this is silly because the fashion will change, and they will look dated, so I have decided now to use
my nice fabrics, and make more cute things, etc...


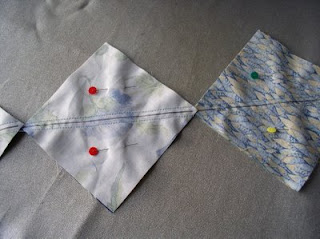
I took some photos of my sewing process to make the block. A pinwheel block is made of 4 half square triangles sewn together.

You take 2 squares, put them right sides together, iron them together so they don't move, and trace a line on one diagonal. Pin, and sew 1/4" from the line on both sides. You can chain sew them one after the other as on this photo.


You then cut on the central line and you
get 2 squares made of 2 triangles.


Press each triangle and then open with the iron, taking care not to stretch the bias edge.

At this stage I usually check the size and recut so that all my squares are the same.


To make the block you just have to sew 4 squares together.

Of course the tricky bit is to match all the diagonal lines in the centre, ironing is important too. Your aim is to get all the seam allowances on the reverse to turn in the same way, and then iron them flat, so that when sewing squares or blocks together the seam allowances will be on opposite sides and will lock together.
OK I should have taken an additional photo here.

If all your blocks have their seam allowances turning the same way, you will be able to sew them together very easily.

This was an easy project I enjoyed, now I have to finish a present for a little girl.