Monday, November 29, 2010

Christmas tree wall-hanging

I was wandering from blog to blog when I happened on this vintage Christmas tree on Pleasant Home. I think I was very interested by the technical aspect of the realisation; it stayed in my mind for a few days, so I knew I had to make it.

And it is that time of year again...

First you make a square of squares. To make this one I cut strips in 11 different Christmas fabrics, each strip 1 1/2" wide, by roughly 50cm or 20 "(the size of a fat quarter very often). You arrange them and sew them together, starting your seams once at the top and the next at the bottom to avoid any twisting. Iron you seams flat, one right, one left so that when you sew them back together they will meet in opposite directions.

Next sew them to make a tube, which you then cut in 1 1/2" wide rings. You open the seam between 2 squares on the 11 rings at different places to vary the colours. I chose to move by one square for each new row, which gives you this effect. You could choose to move 2 squares, or randomly.
Next you sew the rings together, once from the bottom, once from the top, and you should end up with this.

The back of my square with seams ironed flat.

These are the bits left over after squaring up. I will use them later.

Next you fold your square like on the photo, and sew the top and side together, leaving a gap for turning (see fingers).

 Put the seam in the middle, still with the opening, pin and cut the triangle at the bottom. Keep it for later.

 Now sew a straight seam at the bottom, on the wrong side. Take out the pins, cut the extra fabric in the corners, and turn right side out.

 I took the easy option to measure the wadding. I cut around my triangular shape. Easy.
It is more difficult to then push the wadding inside, and slip stitch the opening at the back closed.

 I used the triangle left over to do the same thing, in a tiny size.

That's all that was left, and discarded. Too small to do anything.

 The last stage is the quilting. I used my walking foot to quilt a triangular shape, with a space of 1/2". Easy again.
 I forgot to take a photo of a little ribbon stitched at the top, and another one at the back to hang my tree.

On the small tree I used one of the long strips end, as a binding, I left it too long on purpose.

I hope this will give you ideas for your own Christmas decorations.
The time seems to be flying in my house.

Thursday, November 25, 2010

A funny video on Knitting

 I saw this video on You Tube some time ago, but it is so good, and impossible in a way, it has to make you laugh.
I hope you enjoy it.

The last knit, video on You Tube
  ">

Friday, November 12, 2010

Pink card swap


In October I took part in a pink swap of cards. I really enjoyed it.
I made 6 cards, kept one for myself and sent 5, and in exchange I received these 5 fabulous cards.

Pink champagne from Claire, Edinburgh
Flowers from Pauline


By Jacquie

A calorie free muffin from Barbara in Leeds

Pink ribbons from Benta near Windsor


The backs with "Postcards"stamped on
The theme being Pink, I made some Kokeshi dolls, using a stencil bought in France. These Japanese dolls are quite popular in France and my niece C is especially fond of them.
The front of the cards 

My dear Husband bought me some rubber stamps with "Postcards" in different designs. I used one on the back and I think the result is effective.


I hand quilted around the design with a white thread, but wonder if it was really necessary as I had to use an iron to fuse the buckram to the backing and the front. It flattened everything.
 This is the stencil and all the equipment I needed. Only 3 colours of paint, and the smaller stencil brushes were the most useful on this project.


I enjoyed doing these and my little collection of fabric postcards is growing slowly. Nice.

Tuesday, November 09, 2010

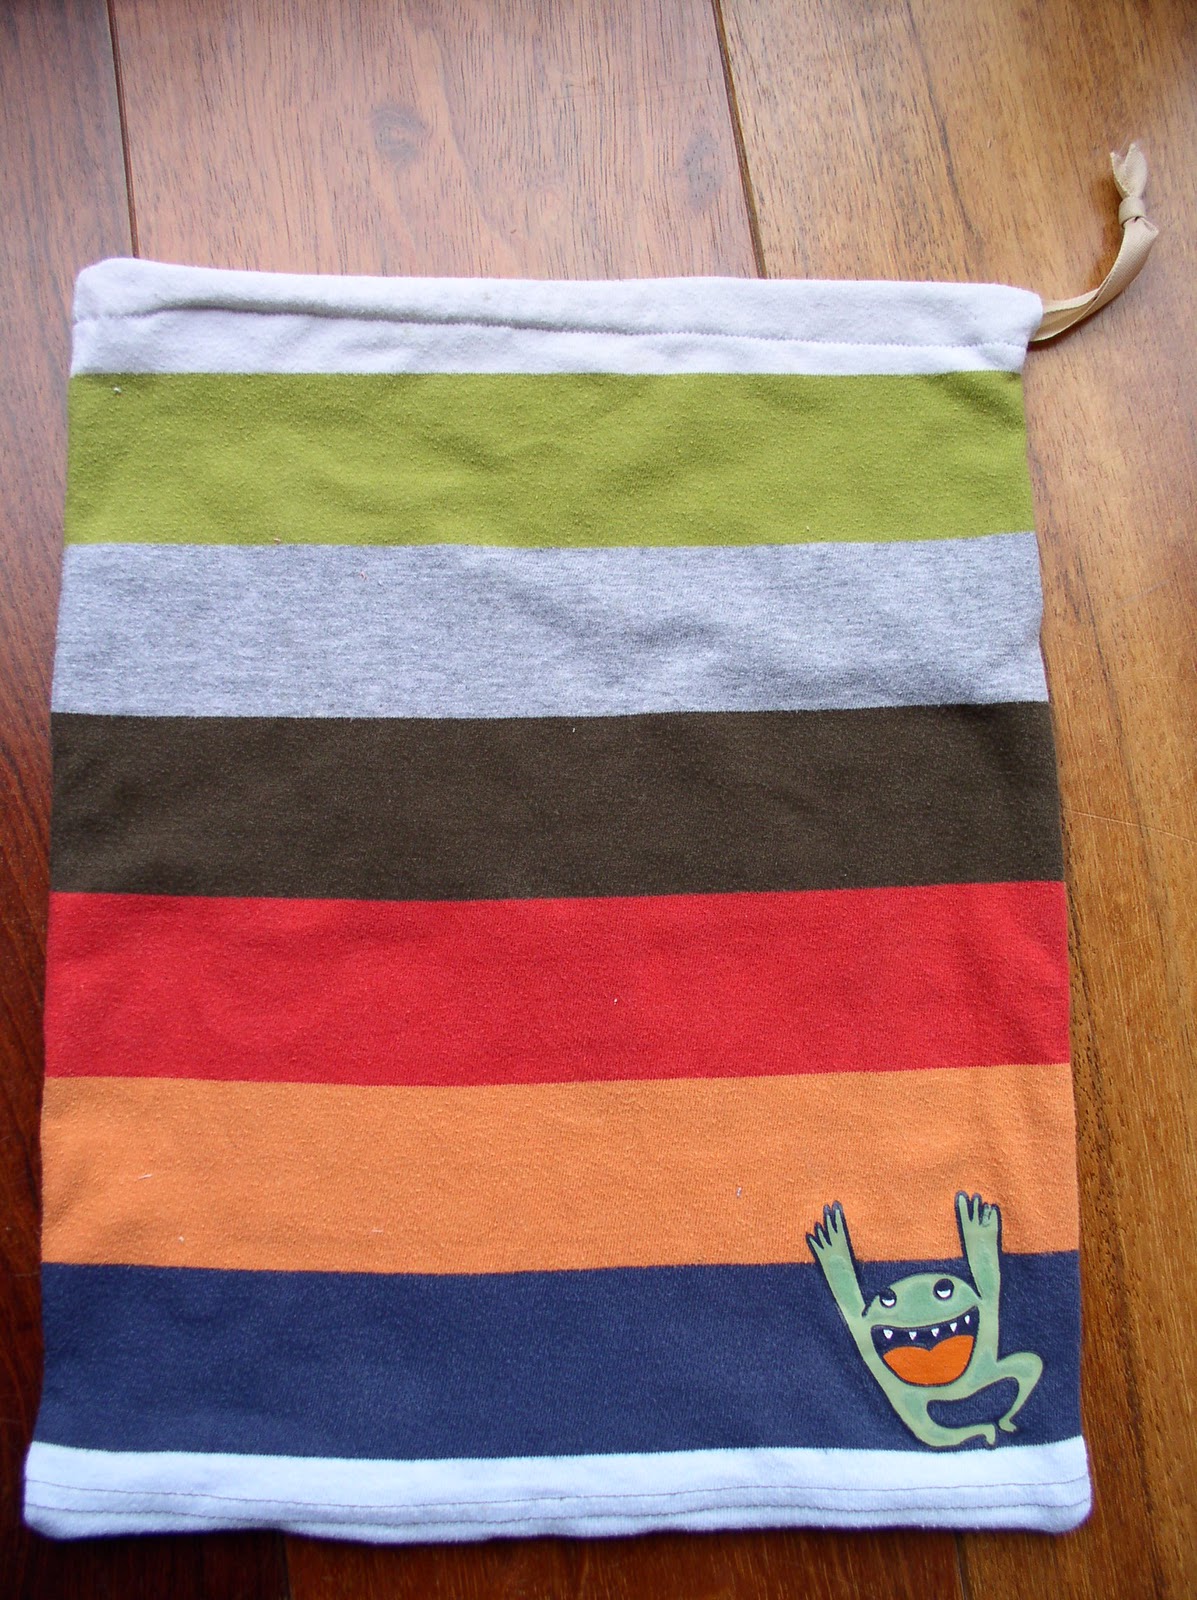
Tee shirt becomes a bag


During the half term holidays, my sister and her family came to visit us. One of her son's favorite tee shirt was becoming too small, so she asked me if I would transform it into a bag.

It stayed in England while they went back to France, but I don't think my nephew realised that. He is 7 years old. He also has several other favourite t-shirts.

And so I used my rotary cutter and a long ruler to cut the sides, and the neckline (this way I avoided the seam of the armholes and made a taller bag).

The next step is to over-sew all the raw edges of the fabric.

To make the pocket, I cut the bottom of one sleeve. I used the hem as the top of my pocket, folded 1/4" on the 3 other sides, and sewed it on one piece of the bag.

Then, when the 2 parts of the bag right sides together, I sewed all the way down one long edge, the bottom of the bag, and the other side, but on that last one I left a gap for the string or ribbon that will close the bag. I left a gap of about 3/4", or 2 cm, and then sewn to the top on the last 1".

Finally to make the channel for the closure, fold twice your fabric at the top of the bag and sew all the way around. The first fold will be your seam allowance, and the second will give you the space for the string to go along the top of the bag.

Then you just need to find a matching ribbon or string, attach it to a safety pin, and pull through the channel. Make a knot and you have a new bag.

It is an easy way to recycle old t-shirts, provided they are flat. I have an old one which I really liked, but it has extra fabric for the breasts, so is not suitable for this technique. Too bad, it was a very nice pattern.

Now I hope that when C receives his new bag, he won't be cross with me for cutting his T-shirt !

Wednesday, October 27, 2010

This summer I took some knitting with me on holidays. It is easy to carry and do anywhere.
I know you might not all be interested in my knitting, but it seems I have some periods or phases when I play with different textile mediums.
I still love my sewing, but sometimes I need more time and place to do it, where knitting or crochet is smaller and you can do just a bit and put it away.


In fact it is one of the risks : it gets put away, and stays there for longer than planned.

 So these are my socks, always the same pattern as the previous ones.

Now I found some gorgeous wool and am starting some mittens on a round needle, but both at the same time. It is a kind of challenge, we'll see if I can manage.

Sunday, October 24, 2010

New cushions on the sofa

In fact the inserts are the old ones, but the covers are new.
I didn't take photos for a tutorial but they are very quick to make. I bought 1 metre and a half (60 inches) of this synthetic furry fabric, and managed to make 4 cushion covers. Each one is roughly 40 cm (16 inches) square finished.


I cut my fabric 42 cm(16 3/4") large by 95 cm(37 1/2") long. It doesn't have to be so precise on the length.
Next you need to sew a double return to make a hem on the 2 short ends.

Now put your pad or insert in the middle, and overlap the ends of your cushion cover, right sides outside. You can decide where you want the overlap to be. Pin the fabrics together. There is no need to measure with this method, it will fit.
Take the insert out through one of the open sides, turn the cover outside in and pin the open sides closed. You need to sew along each of the 2 sides, and then zigzag the edges if necessary (it was for my furry fabric).


Turn it right side out and you have finished. Bravo.
There was no need to put a zip (go to a store and buy one) or to make button holes and hand sew the buttons. It was also very fast.

I was amazed at the mess this fabric made on my floor. Lots of little threads went everywhere.

And I will have to cover more cushions as I realised that the fabric on some of them was getting worn out. It's a shame as I liked them, but then it gives me the opportunity to make something new.

Thursday, October 14, 2010

Pink Union Jack purse


This little purse on the theme of the Union Jack, the British flag, is all pink ! It was a request from DD1 to be used at school and keep her dinner money.
I made it some time ago but had lost the pictures on the computer.
In real life it doesn't look so pristine any more, but is still very much loved.

I had seen things similar in the shops, so the idea is not original, and I thought I could make one myself. It proved  a little more complicated than I thought, but I've done it.

After the front panel was done, I sewed the zip together with the front, back and lining. The rest is easier, although I am not always happy with the ends of the zips. The sides go a bit round, and I don't know what to do about it.
I made it on holidays in France, and it reminds me of a lovely quiet time.

Monday, October 04, 2010

Kokeshi bag

My lovely niece who lives in Le Havre loves the Japanese Kokeshi dolls. She has books about them, and some small reproductions in hard plastic. I made her a bag with a pieced Kokeshi on the front.
Here it is shown by DD3 in her school uniform, just to give you an idea of the size.

The pattern was taken from Quilt Mania, number 77, which was published in the spring.
I used one of their designs, although the round part of the bottom of the face disappears on my bag. I wonder why I took so much trouble to piece this part, and would recommend that you just make a square face.
Here is a close view of the doll finished on the quilted panel that was to become the front, bottom and back of the bag.


Of course I added some little pockets inside, in 2 different purple fabrics.
The edging on the top was made with my sewing machine on a cross stitch point.


I hope she gets to use this bag a lot, as it was given in June this year when we visited for the first communion of her brother and the baptism of her sister.

I'll try to publish more posts from now as I stopped working. More time to sew, hooray.

Thursday, September 16, 2010

Holiday bag

Now I'm back from my holidays, I would like to get this blog going again.


My work has stopped me from sewing as much as I would have liked, but that will finish at the end of September. After that I shall be blogging more often I hope. And sewing lots!

Before leaving for France in August, I made this bag for DD2. The fabric comes from Ikea (no affiliation) and it's quite strong. The lining is made of calico, and the pocket is using the same fabric but going in the other direction.


Let me know if you would like more info on how to make such a bag. I could make a tutorial if there is some demand.

Now DD2 would like to have a little purse to go with it, with a rounded top and a zip. I took the fabric on holidays with me, but had no time to make one. It will happen eventually and I will show you the photos.

I told you I needed more time, and I don't even mention the UFO's.

Monday, August 09, 2010

Knitted socks

I have made some socks before and then I stopped. In fact the first one on that pair was made probably last year. Recently I managed to start the second one, and then stopped again. But now that I am on holidays from work, I managed to finish the second one.This stopping and starting is the reason why they are not completely similar. But I am sure it won't have any consequence when wearing them.

I like the way the toes are finished. It's not like something you see in the shops.

My heels were difficult, but they look all right at the end.
I love my socks.

Saturday, August 07, 2010

Here are the 7 cards I made for the swap. 6 were sent and I kept one to remind me of my work.


The background is made of 6 squares of fabric on the theme of summer. My idea was of a hot day, enjoying a cool drink in the garden.
The glass and jug were glued on the background and then I did some free machine quilting to attach them.
There is a zig zag stitch all around the edges.


I really enjoyed the process of planning and making these cards. My problem is still finding the time to make more.

Thursday, August 05, 2010

July's card swap with BQL

I took part in a swap in July on BQL. We swapped fabric cards. I made 7 and sent 6 of them. In exchange I received 6 different cards.

Today I'll show you the cards I received. They are all different and all beautiful.


This first one from Irene in Scotland is of a thistle of course.
There is some distressed netting, and free motion quilting on the flower, with squares of fabric to make the background.

This one is from Carole in England. Each piece is carefully cut and appliqued on the background.


From Marian K, she had to eat a lot of penguin bars to make her cards and there is a very fine blue non woven fabric on top. Lots of fun.


From Sue W, the photo doesn't make justice to the shiny pieces on the fabric and to the hand embroidery.

From Miriam B there is some machine applique and free machine quilting.


And last in this series but there is no real order, this card from Inge in Germany, hand embroidered with a log cabin.
I am very grateful to all these ladies for the hard work they shared with me. In fact I enlisted on BQL post card group to take part in more card swaps.
Next I'll show you the cards I made.