Wednesday, October 12, 2011

A quick quilt, disappearing nine patch

Sadly in July we learned that my mother in law was not well. She lives in the South of France, very far from England in a way, and had to go to hospital. They found out she had osteoporosis, and had broken a vertebrae.
We were going on holidays there so I wanted to make a quick quilt to take with us.
 An easy pattern is the disappearing 9 patch. You sew your squares together 9 by 9, as on these 2 photos. I had some pre-cut squares and used these.

One 9 patch block

 Then you cut right through the middle in both directions.

 Finally shuffle your blocks and choose your favorite design.


 This is how I put my blocks together. I find it difficult to capture the right colour of the fabrics.


 A photo of the back, in the garden of the house we rented in South of France in August. I did some very simple quilting as I was rushed for time. The back is made with 2 pieces of small pink flowers fabric.
The folds are nothing to worry about, just the consequence of travelling a long way.


With a corner of the back.

I added a small border to make this lap quilt a bit bigger, and it's a nice finishing touch.


DD3 is showing it fully, she has growned a lot, nearly my size.


My MIL really appreciated the quilt. She said it was the first she had. I explained that I haven't made many, especially outside the close family. DD2 is still waiting for me to finish hers. It's in the work in progress pile.

I'm sorry I didn't show this before. it's only from looking through the past posts that I realised I had forgotten to show you  the photos.
I have more projects to illustrate, just need to find time to blog.

Enjoy your sewing.

Pascale

Monday, October 10, 2011

a nice little cake


As a group activity, we made some fabric cupcakes. I was hoping to take a photo of several others, but they don't seem to have been finished.

 To make a cupcake, draw a circle on your bottom fabric, including a seam allowance (you can use a bowl, plate whatever is at hand). Cut and then use wadding or felt to cut a smaller circle (no seam allowance, that's the only difference).
To get the shape I made some cuts in my 2 circles. Holding them together with pins, fold in half and cut on 2 folds. Repeat the other way, you have 4 cuts around your circle. then pinch the folds inward and sew the fabric together, making a triangular shape. The end of your seam, towards the centre of the circle is thiner than the beginning.
I repeated the process and finally had 8 seams all around. That gave me a good cupcake shape.

 The next stage is purely decorative. I used ric rac on the edge.

  I had some pink fabric for the top, but it was a bit boring, so I used 2 colours of embroidery and randomly put some stitches. I cut this red flower from a piece of flower ribbon.
Fill the interior of the cupcake with soft toys filler, or bits of wadding left over.
Sew the top fabric by hand.

And there you have a yummy cupcake. You could of course use it to put your pins in.

Enjoy your sewing.

Monday, September 26, 2011

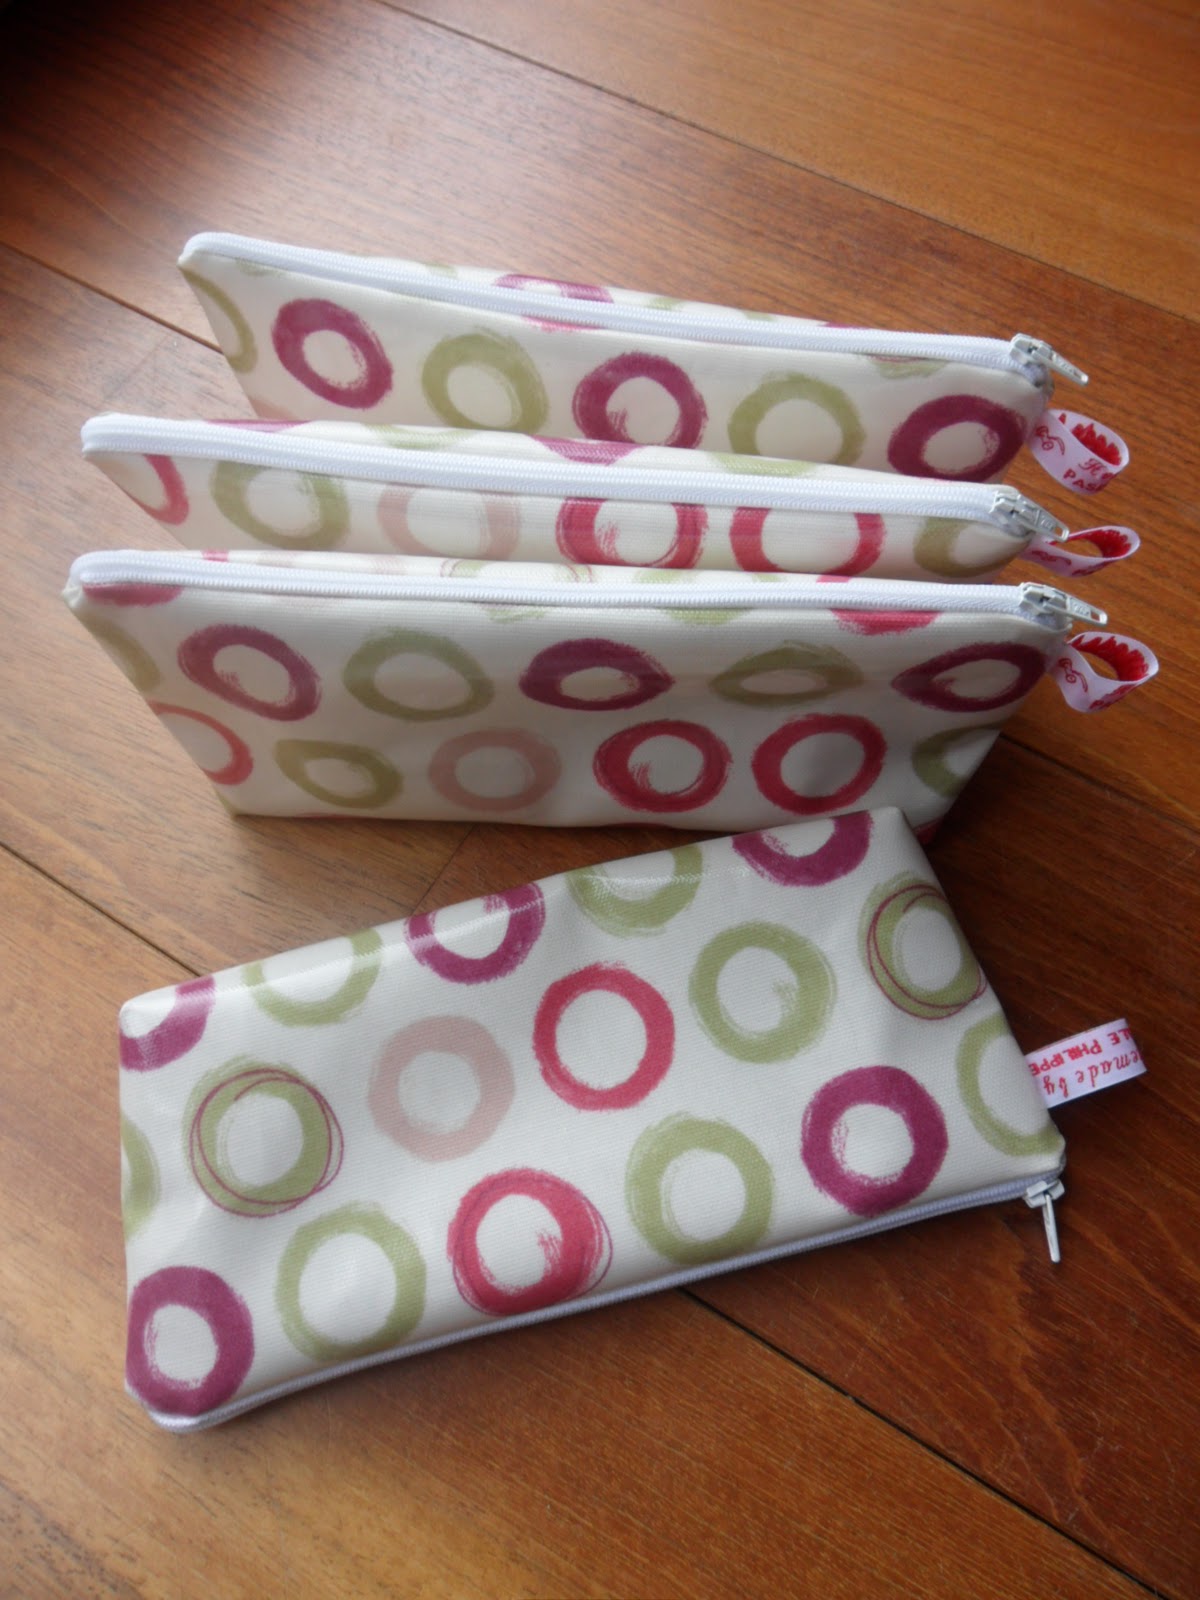
New oilcloth pencil cases for school

Sometimes you see oilcloth or "Tissu enduit" in French, and the designs are just so great. I use them mostly to make pencil cases for the girls, and only buy half a metre of a design.
Here is my latest batch, made this afternoon.

 Today I made 4, and 2 of them have gone already for DD3 and her best friend Bernadette. They were pretty excited to have them.

 I can't remember where I bought the fabric, but I think it was DD1 who chose it. Tha't s why I have some spares.

 To be able to stand, I gave them this cornered bottom.

There isn't any lining, which makes them fast to sew.


 This smarties fabric I found in Dunelm, I suppose it is primarily for children's parties. It was cheap anyway, and just perfect for a pencil case. Cheerful.

I used the same construction, and DD4 has got one since this morning. I have one spare.

Have fun sewing.

Pascale

Friday, September 23, 2011

More fabric post cards

There were 2 birthdays recently in our card swap.
 The first card was sent to Sandra at the beginning of September, because she's a star..

Each square is 1" finished.


 And this was for Plum, she chose the theme of architecture, so I took little bits of grey and beige fabric, and fixed them by putting some sheer fabric on top, the one I received with flowers from DH. The fabric is grey on top of the white background.
The free motion quilting was done with silver thread.

I'm trying each time something different, on such a small scale it is fun. This worked quite well, with a pleasing result.

Have a great time sewing.
Pascale

Friday, September 16, 2011

Laptop bag

I'm still here and as the girls have now gone back to school, I am slowly catching up on everything. I read my emails on the day they arrive, which is a big progress. There are a few things still demanding my attention.


But I want to show you my new laptop bag. Having 4 girls in the house, 3 of them teenagers, we have a lot of laptops. 5 plus DH work one. At home he is sharing his with DD4. We bought laptop bags but they are very bland. And they are obvious in their design so not very good to protect your property from being stolen. Why not have a different bag.

I've tried to take some pictures while working on this project. Here are my pieces prepared. You would measure your own laptop to adjust the size.
I had some fabric for the body of the bag; it is a long rectangle that goes from the front, around to the back and makes the flap as well. You  need it twice, or in my case a 1 metre piece, folded, and the left over was used for the pockets.

 Here is the piece folded.

 This strippy fabric is for the partition in the middle of the bag, to create a pocket for the computer, and separate it from the papers, wires,etc.... There wasn't enough of the first fabric for that part. It makes you creative !
There is a piece of wadding the same size, which is the surface of the computer plus 2 rectangles, one on each end for the depth of the computer. Add a seam allowance of course.

For my strap I had to find another fabric again. It's quite fun. It measures finished 3 1/2"(9cm) wide by 63" (160 cm). The strap is also the side of the bag. There is some wadding inside to make it more comfortable to carry.

So here is my partition quilted. 11" high by 20 " long. It's not a snug fit, and again you need to measure your own computer.

Next I made some pockets with bits of fabric left over. I like to make them lined, so I cut my fabric twice the size of the pocket, fold it right sides together, and sew around 3 sides and 4 corners, leaving a small opening that will be sewn when the pocket is put on the bag. Easy.

Cut the corners and turn right side out.

I sewed a line at the top, 1/4" from the seam. I should have ironed it !

For the main body of the bag, I used the envelope method to attach the fabric and wadding in a rectangle shape, leave a gap, cut the corners, turn right side out.
Then I quilted following the design that was to be outside, with a walking foot on the machine, plus around my rectangle about 1/4" all the way.

This is the time to put your pockets on . Here on the inside partition.


I was wondering how to attach the partition to the sides, in a nice way. The first side is easy, and the seam allowance is in the pocket.

That's a nice finish inside.

This is the other side, slightly more tricky because you can't hide it inside. So I folded and sewed.


Here is a view of the pocket for the laptop. I have left the bottom open, because the computer can't go through it, but other things could. You could decide to sew the bottom.


My next step was to attach the strap/sides. It's easy but you need your walking foot. You position the bottom  of your strap where you want it (back, bottom and front of the bag), use plenty of pins and sew around. Pivot at the corners. Take your time.

Inside view of the compartment for paper and wires.

There is also a pocket on the body under the flap of the bag for pens and paper.

Bag open with the flap at the back.
View of the 2 compartments of the bag, plus pockets.

My bag is finished.

I hope you enjoyed these explanations. I haven't put many measures because this needs to be adapted to your laptop.
Have fun sewing.

Wednesday, August 24, 2011

Bat card

After downloading the holiday photos, I realised I have a few things to show you.
This one is quick. As part of the birthday card swap I made a bat card for Jan. The animal is purple (bad colours on the photo), and I was lucky to have the fabric for the back.


I embroidered the face and body of the bat, and gave her feet. The wings can flap, they are not sewn down.

I hope you find the time to do some sewing.
Pascale

Monday, August 22, 2011

Pink crocheted hat

I forgot to show you this hat I crocheted.
 The design is from Laura Cracknell  from "Made in Oxford". She has a page on Ravelry.

 I made the hat for DD3 who is modelling here in her school uniform . I made the flower to go on the hat, but she doesn't want it. Too bad. It could become a brooch.


 I bought the pattern in a shop called "Wool" in Bath, 10 metres away from my favourite patchwork shop "Country Threads" mentioned before. The thread is variegated and produced by Louisa Harding, Grace col. 20.

And some detail to show you the shells. Very nice if I can say so.

Happy sewing.

A bit of news

I don't have a photo, and just wanted to let you know that we were back from our holidays. Sadly the buying of a new house is not going to happen as there was too much work to be done on the property for our liking. We have to start looking again and that's hard.
I did some sewing and need to get around to downloading some photos to show you. This blog has been a bit too quiet lately, I'll try to do better (that should be easy, just post a bit !).
Happy sewing.
Pascale.