I saw this pattern and tutorial on this blog :"
Dog under my desk" by Erin Erickson.
I liked that idea, although the family was not so keen, I thought they might use them once they are made. Either to protect their ear-buds for the iPod, or other small things like coins or keys.
I have not bought the new tutorial she made but used the one on the blog, and made some notes as I went, as well as some changes. So here we go.
Do not cut circles. It is easier to work with 5” squares as
the fabric tends to move when you sew the zip on. Better cut the shape at the
end, after sewing the circle.
I’ve cut the pull fabric as a 2” square as on the photo of the tutorial, and then followed
the instructions.
I've cut enough fabric to make 6 cases, in different fabrics, mainly left over from other projects.
On the sewing machine I use a Zipper foot, and a walking foot when there is wadding in the construction. It helps the fabric move at a regular pace.
I sew the backing to the zip first, with a very small seam that will disappear later in the seam allowance, before sewing the front plus wadding. This way I am sure that the back is not going to move while I’m concentrating with the front.
I have used some zip by the metre, where I fit the pull myself. I tend to buy 2 metres at a time and cut to size. As I am in England I buy them from Dunelm. I believe they are made for cushions or upholstery, but perfect for small items as well. You have to put the pull on before you sew the zip as it can offset the 2 sides of the zip by a margin.
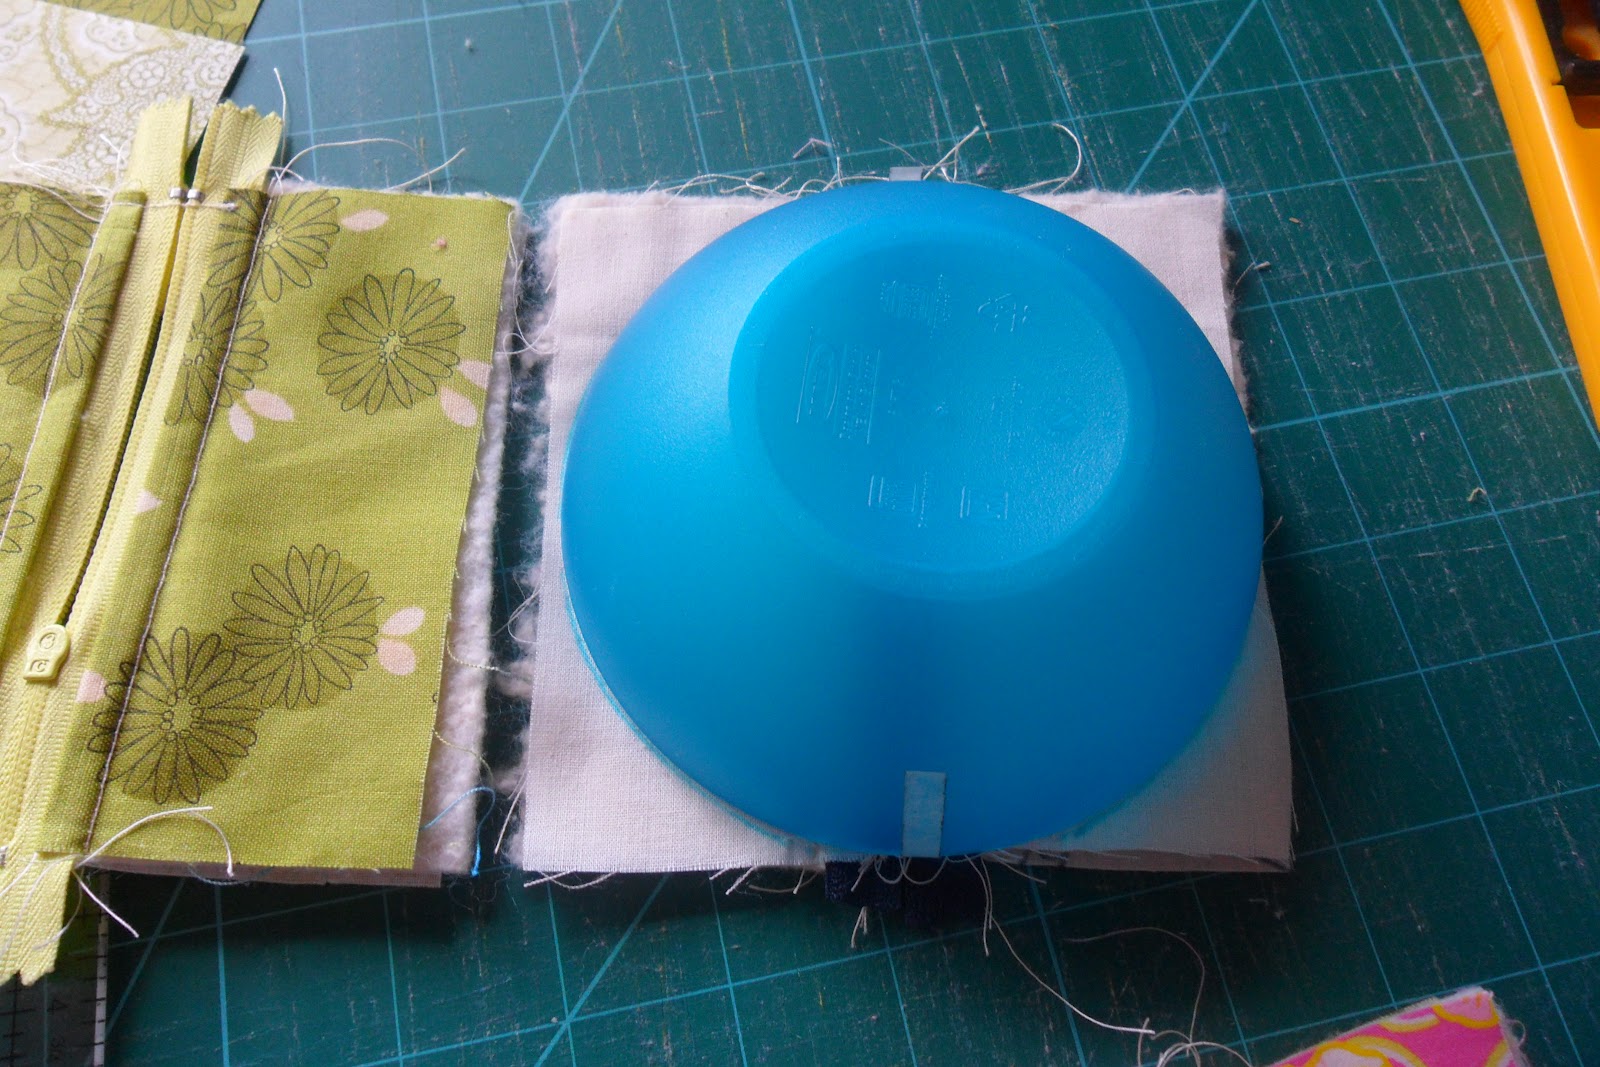
Oh and for my round shape, as I couldn’t download the pattern There was a storm in the afternoon and the internet was down for a while), I used an Ikea plastic bowl. It is just the right size for my 5” squares, but you might find something else in your own kitchen.
I sewed 1/4" inside the line drawn with erasable pen.
It’s better to cut off the wadding before cutting the fabric down to a round shape. You have more grip on the fabric and can reduce the bulk created by the wadding.
This is my case, right way out, but I preferred to sew around on the outside. It flattens the shape and gives it more definition.
And so at the end I made 6 cases for my 4 girls and as presents. I am sure we will find lots of use for these. I just need to find a metal ring to put in the tab.
Slightly open so that you can see the lining.
I hope this makes you want to do more sewing, or start a little project that doesn't tie you down for long.
Enjoy your sewing.
Pascale.


4 comments:
They are so sweet!
They are lovely, and as I have some endless zip in the cupboard I might make some later in the summer - or get the girls to join in and help with them!
Thank you for the tutorial Pascale :) These are such a great idea. Elly
Post a Comment