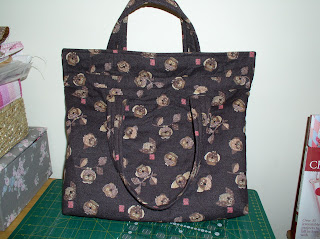
This didn't end up as it was supposed to.
I really like it, but I intended to make a sewing purse for my niece and it is way too big. I started thinking that she would need space for some long scissors, and to keep her projects in, so I aimed a bit big.
It is only when I had done all the quilting, put the zip in and started to sew the sides that I thought maybe it wouldn't be that small.
I bought her, yes sorry there wasn't enough time to do another one, something else and filled it with goodies, including a pink
needle holder . She loved it so everything is well.
I am keeping this purse/big bag, how to call it, and will use it to store fabric near my sewing table, and protect it from the light. I love the finished product, bright colours.
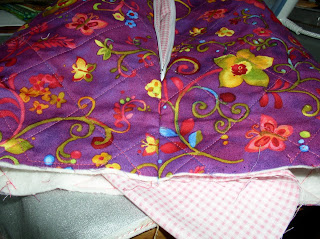
These photos show you the fabrics used. A fat quarter of the purple with flowers wasn't enough, so I added some pink for the bottom of the case. I quilted it with a grid on point as you can see on the second photo.
I then put the zip between the 2 ends of my piece and sandwiched it with the lining. There is a seam before and after the zip to go down the sides.

The lining at this point is a rectangle the same size as the top.
On the right is a view of the inside at this point.

Now take your project right side out, fold it and put a pin to mark the middle of the bottom, and then the middle of the sides, ie the point folded when the 2 previous ones meet.
Decide how big you want your fold to be, which will decide of the height of your case; draw a 45degree angle between the pin in the middle of the sides and the fold (see photo to understand). Sew the four corners, and then the seam in the middle. Cut the surplus fabric from the angles.

For the lining sew the sides together with the zip in the middle. measure the width of the case and draw on the lining. And following the photo pinch the angles, draw a line, sew and cut the spare corners.
On the second side of the lining, leave the first seam open so that you can turn all of the case out.
After doing that slip stitch closed.


