Monday, November 29, 2010

Christmas tree wall-hanging

I was wandering from blog to blog when I happened on this vintage Christmas tree on Pleasant Home. I think I was very interested by the technical aspect of the realisation; it stayed in my mind for a few days, so I knew I had to make it.

And it is that time of year again...

First you make a square of squares. To make this one I cut strips in 11 different Christmas fabrics, each strip 1 1/2" wide, by roughly 50cm or 20 "(the size of a fat quarter very often). You arrange them and sew them together, starting your seams once at the top and the next at the bottom to avoid any twisting. Iron you seams flat, one right, one left so that when you sew them back together they will meet in opposite directions.

Next sew them to make a tube, which you then cut in 1 1/2" wide rings. You open the seam between 2 squares on the 11 rings at different places to vary the colours. I chose to move by one square for each new row, which gives you this effect. You could choose to move 2 squares, or randomly.
Next you sew the rings together, once from the bottom, once from the top, and you should end up with this.

The back of my square with seams ironed flat.

These are the bits left over after squaring up. I will use them later.

Next you fold your square like on the photo, and sew the top and side together, leaving a gap for turning (see fingers).

 Put the seam in the middle, still with the opening, pin and cut the triangle at the bottom. Keep it for later.

 Now sew a straight seam at the bottom, on the wrong side. Take out the pins, cut the extra fabric in the corners, and turn right side out.

 I took the easy option to measure the wadding. I cut around my triangular shape. Easy.
It is more difficult to then push the wadding inside, and slip stitch the opening at the back closed.

 I used the triangle left over to do the same thing, in a tiny size.

That's all that was left, and discarded. Too small to do anything.

 The last stage is the quilting. I used my walking foot to quilt a triangular shape, with a space of 1/2". Easy again.
 I forgot to take a photo of a little ribbon stitched at the top, and another one at the back to hang my tree.

On the small tree I used one of the long strips end, as a binding, I left it too long on purpose.

I hope this will give you ideas for your own Christmas decorations.
The time seems to be flying in my house.

Thursday, November 25, 2010

A funny video on Knitting

 I saw this video on You Tube some time ago, but it is so good, and impossible in a way, it has to make you laugh.
I hope you enjoy it.

The last knit, video on You Tube
  ">

Friday, November 12, 2010

Pink card swap


In October I took part in a pink swap of cards. I really enjoyed it.
I made 6 cards, kept one for myself and sent 5, and in exchange I received these 5 fabulous cards.

Pink champagne from Claire, Edinburgh
Flowers from Pauline


By Jacquie

A calorie free muffin from Barbara in Leeds

Pink ribbons from Benta near Windsor


The backs with "Postcards"stamped on
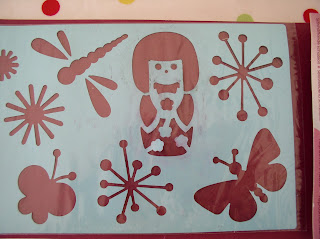
The theme being Pink, I made some Kokeshi dolls, using a stencil bought in France. These Japanese dolls are quite popular in France and my niece C is especially fond of them.
The front of the cards 

My dear Husband bought me some rubber stamps with "Postcards" in different designs. I used one on the back and I think the result is effective.


I hand quilted around the design with a white thread, but wonder if it was really necessary as I had to use an iron to fuse the buckram to the backing and the front. It flattened everything.
 This is the stencil and all the equipment I needed. Only 3 colours of paint, and the smaller stencil brushes were the most useful on this project.


I enjoyed doing these and my little collection of fabric postcards is growing slowly. Nice.

Tuesday, November 09, 2010

Tee shirt becomes a bag


During the half term holidays, my sister and her family came to visit us. One of her son's favorite tee shirt was becoming too small, so she asked me if I would transform it into a bag.

It stayed in England while they went back to France, but I don't think my nephew realised that. He is 7 years old. He also has several other favourite t-shirts.

And so I used my rotary cutter and a long ruler to cut the sides, and the neckline (this way I avoided the seam of the armholes and made a taller bag).

The next step is to over-sew all the raw edges of the fabric.

To make the pocket, I cut the bottom of one sleeve. I used the hem as the top of my pocket, folded 1/4" on the 3 other sides, and sewed it on one piece of the bag.

Then, when the 2 parts of the bag right sides together, I sewed all the way down one long edge, the bottom of the bag, and the other side, but on that last one I left a gap for the string or ribbon that will close the bag. I left a gap of about 3/4", or 2 cm, and then sewn to the top on the last 1".

Finally to make the channel for the closure, fold twice your fabric at the top of the bag and sew all the way around. The first fold will be your seam allowance, and the second will give you the space for the string to go along the top of the bag.

Then you just need to find a matching ribbon or string, attach it to a safety pin, and pull through the channel. Make a knot and you have a new bag.

It is an easy way to recycle old t-shirts, provided they are flat. I have an old one which I really liked, but it has extra fabric for the breasts, so is not suitable for this technique. Too bad, it was a very nice pattern.

Now I hope that when C receives his new bag, he won't be cross with me for cutting his T-shirt !