Tuesday, October 28, 2008

Little pyramids of l..avender


This was an inspirational moment. I just had to start and do it after seeing some pyramid bags with a zip on the internet. I was pondering how to put the zip easily when I remembered buying some lavender this summer in a shop in Cirencester.


And so I decided to make some lavender bags in the shape of a pyramid, with a bit of ribbon to attach them to a hanger or to put in a drawer.


They are really easy to make. The only rule is that you take a piece of material that is double the length than the height. For me they were 3 1/2" x 7". I used little bits left over from projects, sometimes had to sew them together.


You fold the fabric in 2, right sides together, and sew along 2 sides, after inserting a piece of ribbon in one of the corners, so that the 2 little ends stick out.


Then fold your fabric on the open side, so that your seam is in the middle of the length to sew. You can leave 1" or 2 cm open to turn the bag out and fill the little pouch with the lavender.


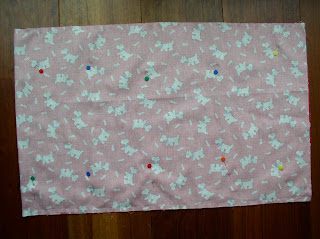
I took this photo on my first attempt, when I left the hole on one of the first seams, I changed after but they all work. The idea is to have a hole somewhere.


Then, of course, you turn it inside out, fill it with dried lavender, or whatever you want to use, and slipstitch the opening closed.


I was quite pleased to have done 7 in the afternoon, but then my girls came back from school and wanted 1 each, and that's 4 gone (but I am secretly happy that suddenly they like the smell of lavender). I am hoping to be able to make some more, as little presents ready to be given.

Enjoy this quick project.

Monday, October 20, 2008

Experiments in Fimo


I saw on a blog (but didn't take note straight away so can't tell you which) that you can make buttons using Fimo paste. It is like a playdough, you can mix the colours but at the end you put it in the oven for 20 minutes at 100C, and you get real buttons.


We, me and DD1+DD2, made the shapes and then punched the holes. It was fun, still experimental, and we have a big result. Not up to selling standards, they are all different sizes.


That's my hand, to show you the sizes and shapes.


You only need a minimum to start : a sharp knife to cut the paste, something to make a hole, and websites suggest small cake cutters to cut shapes. We just bought some, haven't tried yet.


I hope this makes you want to try it. It is great fun, you can do it with children, and you can use them afterwards on bags, as decorations, etc...


Here are 3 batches on an A4 piece of paper.

Wednesday, October 15, 2008

How to make a simple bag


Our family needs something to keep our rolls of wrapping paper tidy and protected. And so I thought I could make a simple bag and show you how.


I needed a long piece of rectangle fabric, obviously, fold it in 2 right sides together, pin and sew along each side. Zigzag over the seams to make sure the fabric doesn't fray.


Cut some fabric for the 2 handles, mine was 18"x2 3/4" for each, because that's what I could use, and didn't want them to be too long; fold in 2 right sides together, sew along the long edge at 1/4", turn the handles to the right side (a bit fiddly so don't make them too narrow), iron with the seam in the middle, and topstitch twice so that they lay flat.


Iron a double hem at the top of the bag, measure and place your handle ends in the seam allowance, and sew all around the bag. Then turn it right side out, and topstitch where the handles are attached to the bag so that they are maintained flat to the top.


Et voila...


Easy, there is no lining, just change the size to make a shopping bag, or one for the children, the library, etc... Have fun with the fabrics, add pockets, or embellishments.


Mine is going to live in the cupboard under the stairs sadly, but at least it is very big to carry all the rolls. And I had the fabric for a long time, with no specific use in mind.


Go on make some bags yourself...

Monday, October 13, 2008

Quilting by hand


I have not put many posts at the moment as I am enjoying some quilting by hand. It is likely to take many more hours before I have finished, so I will only show you some photos of a work in progress.


I think the final effect is worth the effort. You may remember this quilt as my jelly roll log cabin, where I asked you which design you preferred to put my blocks together. And yes it took me that long to start quilting it...
I bought a platic template for the feather pattern. I tried to make my own template with some plastic and a special cutter with 2 parallel blades, but it was too much hard work. Tell me if you ever succeeded with that.
It is a very good thing to do in front of the tv at night, but it will take me a long time.

Tuesday, October 07, 2008

My first celtic block


I can't believe that I had never done that technique before. I have done some cathedral window, but never celtic.


The idea is that you use a bias strip to make your design on the fabric. The added detail here was the different pieces of fabric inserted in some of the space created by the bias strip.

It's not really difficult, but it takes time, a lot of time I would say.

You start by copying your design on your fabric, marking the 2 sides of your strip. You must be careful to mark the crossing points and indicate which strip is above the other. You make your bias strips by cutting your fabric on the bias, 1 1/2"wide, fold them in 2 and sew 1/4" along the cut edge. You can recut the seam allowance if you want it smaller, or leave it to give some volume to your strips.


You insert the metallic bar and iron on it so that the seam is in the middle of the strip and will be hidden when sewn down. Be careful as the metallic bar becomes hot with the iron.


Then you start pinning your strip. You can mark a strip going under by inserting a leftover bit of bias at the crossing point.


In fact it is better to have small portions of bias, as you just hide the joints at the jonction under another strip of bias. As you can see on the photo, the beginning of the first strip is hidden by another bias above it.


And so you sew around your project, you fold the bias for the points in the centre and I decided to cut some of the surplus fabric under at that point, so as to reduce the bulk.


I am glad I have finished, as it took me longer than I thought.
I will use this blog later in DD3 bed quilt, when I seriously start to work on it. Until then I have a few projects to finish, and my october bag to start.
I hope you enjoyed these quick explanations.